Many of our clients often ask for guidance on improving the user interface of their Learning Management System (LMS), which serves as the initial interactive experience for users accessing the modules. This blog post delves into the addition of an enrolment link to facilitate course registration.
The LMS comprises standard and customized pages that dictate users’ experience. The user’s “home” page is the first page they encounter, which showcases information tailored to their learning needs. It features the learner’s to-do list, learning history, curricula progress, and more. Additionally, the LMS presents various other standard pages that enable learners to access information that caters to their future requirements.
To achieve our goal, we will follow a two-step process:
First, we will generate a classroom session that is appropriate for our intended audience. Next, we will customize a tile on the landing page of the Learning Management System (LMS) specifically for the chosen user group.
To create a custom tile, follow these steps:
- Go to the Landing Page Settings tab on the LMS Admin Console under System Administration -> Application Administration.
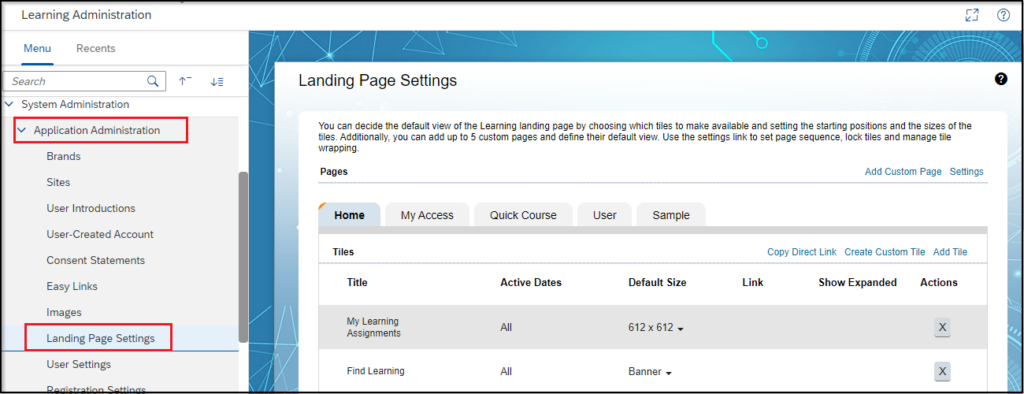
2. Click on the “Create Custom Tile“ button on the screen
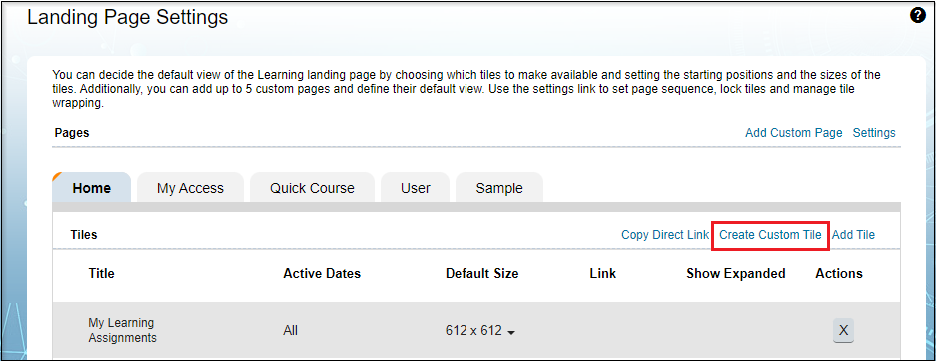
3. Add a tile name and select the target user group.
- Add a tile name (this is the admin-facing title, not the user).
- We can select the show tile for the group as organization-specific or User Group.
- Select the show tile for all dates or specific dates, which indicates the dates the tile should display. we have created along with adding the required User group for which the tile is to be made visible
- Chose the display size.
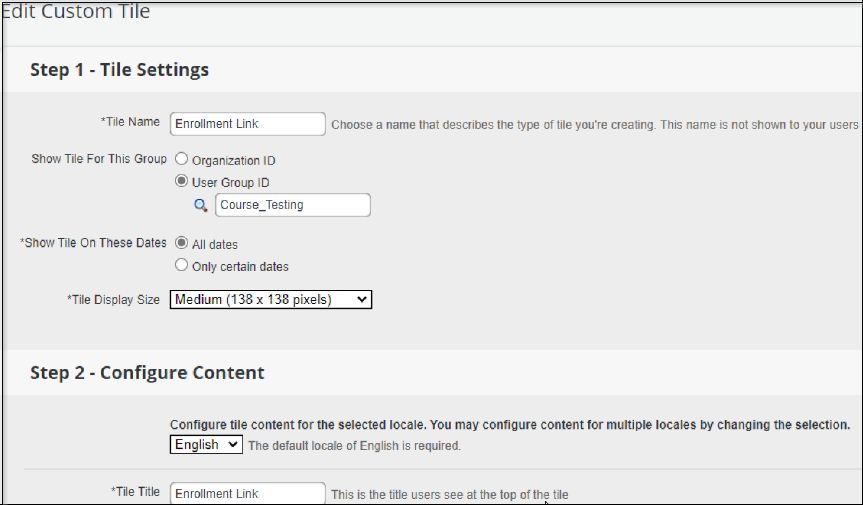
4. Choose the display size and select the location (if the session is for multiple locales, you can customize the same tile in different languages) you’re adding the content for.
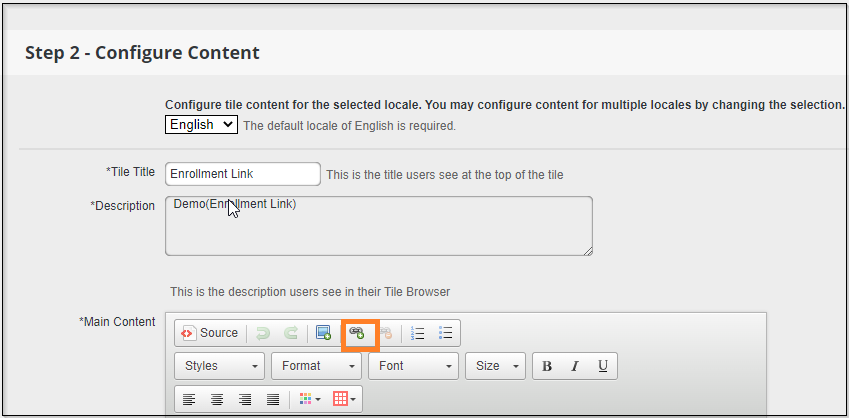
5. Create a user-facing title and description, and add the class URL before clicking ‘Okay’.
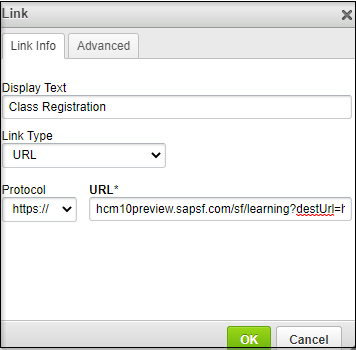
Figure.5-Link Page
6. Go to the Enrolment Link Custom Tile and click on the upcoming class registration link.
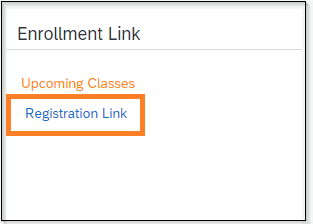
Figure.6- Enrollment Link
7. Click on the “Register Now” button to complete the registration.
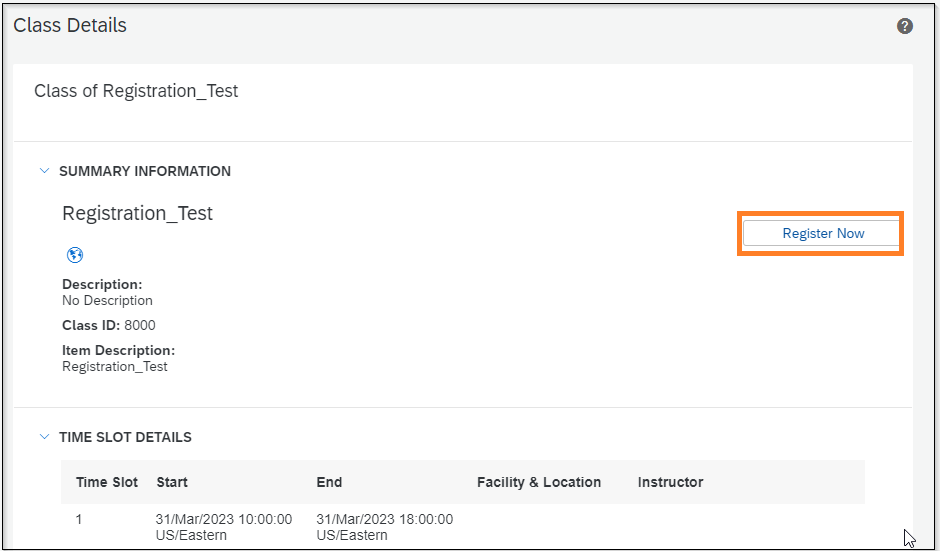
Figure.7-Class Details
We appreciate you taking the time to read this blog!
The Learning Landing Page is often the first experience a user has with the LMS. By implementing the solution described above, we can enhance the user’s view of this page and provide dynamic navigation options through the use of hyperlinks that lead to specific learning items or course categories. SuccessFactors provides a user-friendly platform for designing landing pages that can be tailored to specific groups within a company.
Related Links and Videos on SAP:
SAP SuccessFactors Learning Landing Pages | SAP Help Portal
SAP SuccessFactors Learning Overview – YouTube
SAP Learning Hub | Build and maintain skills with digital learning
References:
1, KBA reference from SAP Launchpad
2, We have used all the Screenshots from our Demo system.
3, SAP Documentation from https://help.sap.com/